How to set different keyboard types in SwiftUI
Choosing the right keyboard type is one of those small details that can noticeably improve the user experience of your iOS app.
If your user is entering an email address, showing the default keyboard makes their job harder than it needs to be. The same goes for phone numbers, URLs, or numeric values. Luckily, SwiftUI makes this very easy.
In this guide, you’ll learn how to set different keyboard types in SwiftUI, when to use each one, and a few practical tips to avoid common mistakes.
Why keyboard type matters
The keyboard is part of your form design.
If you ask for an email, show an email keyboard.
If you ask for a phone number, show a phone keypad.
If you ask for a website, show a URL keyboard.
This reduces friction, speeds up typing, and makes your app feel more polished.
Basic usage
In SwiftUI, you can set the keyboard type by applying the .keyboardType() view modifier to a TextField.
Here’s the simplest example:
import SwiftUI

struct ContentView: View {
    @State private var email = ""

    var body: some View {
        TextField("Enter email", text: $email)
            .textFieldStyle(.roundedBorder)
            .keyboardType(.emailAddress)
    }
}
That’s it. Once the text field becomes active, iOS will show the email-friendly keyboard.
[Screenshot Placeholder: Email TextField with email keyboard visible]
Common keyboard types in SwiftUI
Below are some of the most useful keyboard types you’ll likely use in real apps.
Default keyboard
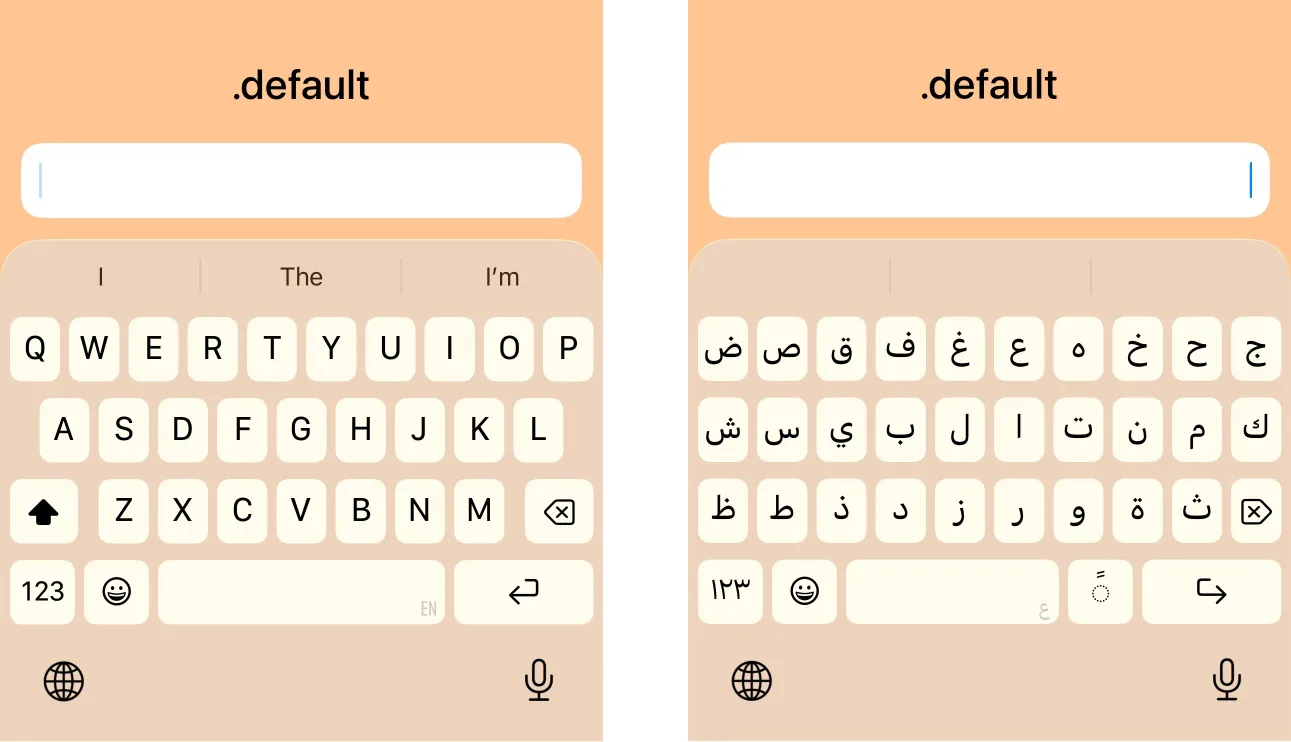
This is a general-purpose keyboard for typing letters, numbers, punctuation, and emoji. Use .default when no other keyboard type noticeably improves the typing experience for the expected input.
TextField("Username", text: $username)
    .keyboardType(.default)
Email keyboard
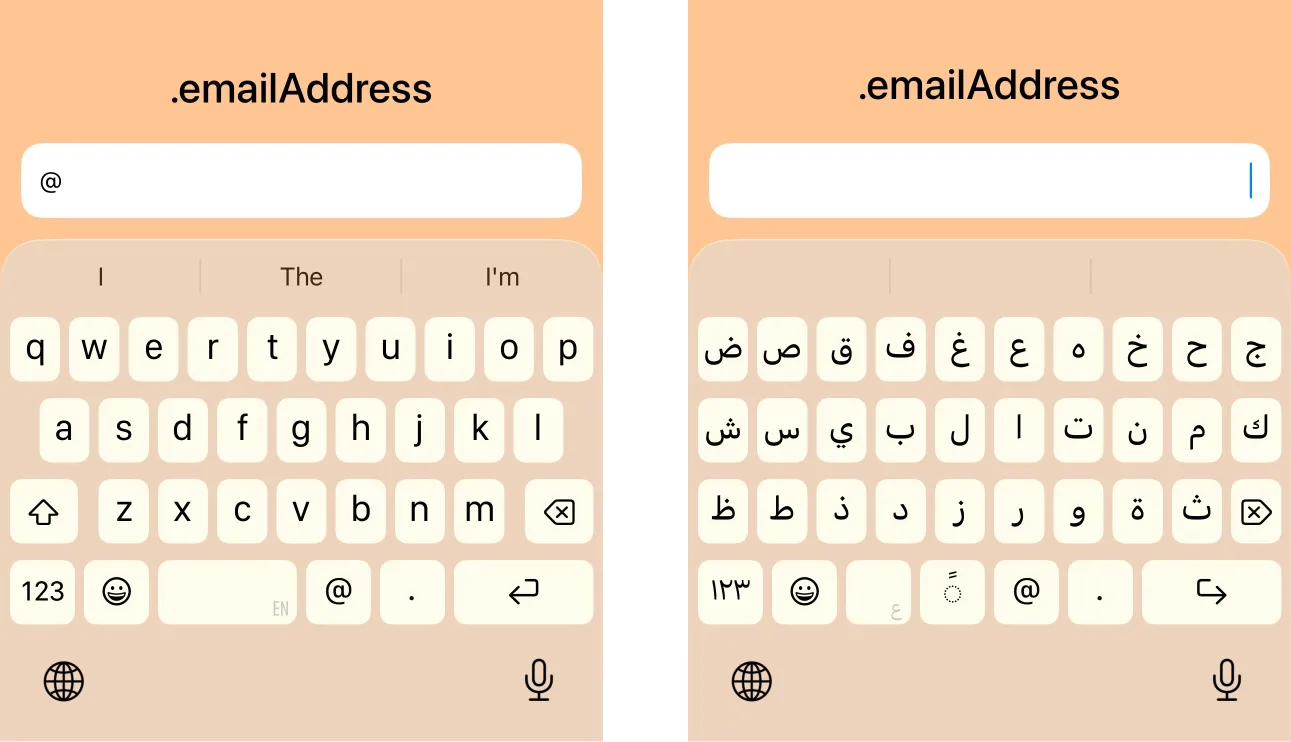
Use .emailAddress when the user is entering an email address.
TextField("Email", text: $email)
    .keyboardType(.emailAddress)
    .textInputAutocapitalization(.never)
    .autocorrectionDisabled()
This keyboard makes characters like @ and . easier to access.
In most cases, it is a good idea to also disable autocapitalization and autocorrection for email fields.
Phone pad keyboard
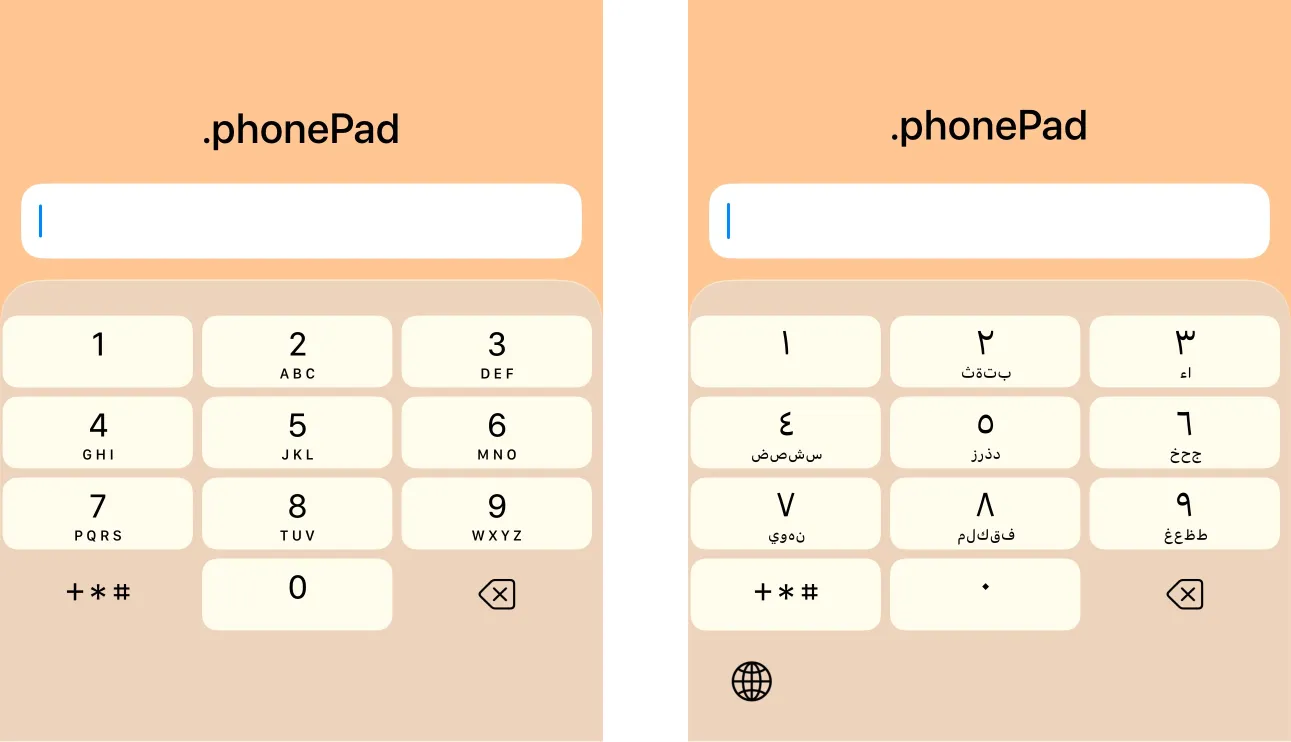
Use .phonePad for phone numbers.
TextField("Phone number", text: $phoneNumber)
    .keyboardType(.phonePad)
This is a good choice for phone numbers or call-related flows.
Number pad keyboard
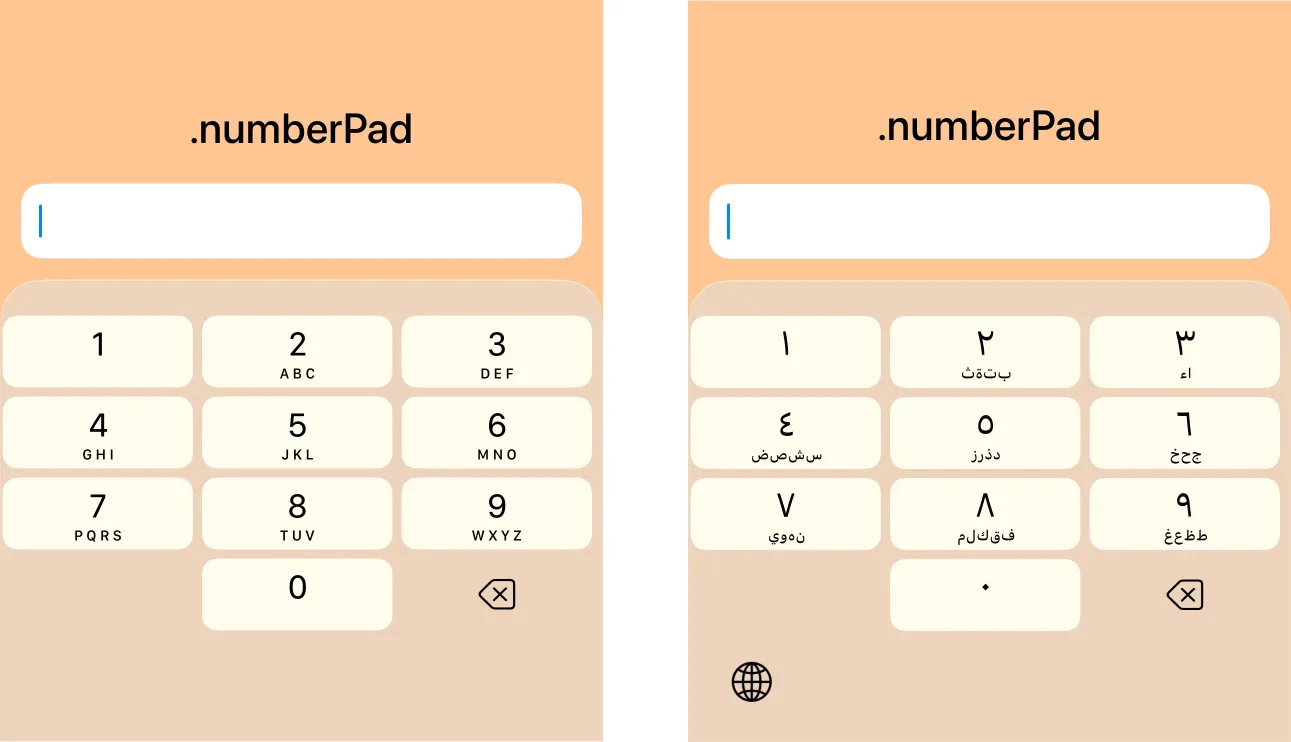
Use .numberPad when the input should contain only digits.
TextField("Age", text: $age)
    .keyboardType(.numberPad)
This is useful for age, quantity, PIN-like numeric input, and integer-only values.
Be careful: .numberPad does not include a decimal separator.
Decimal keyboard
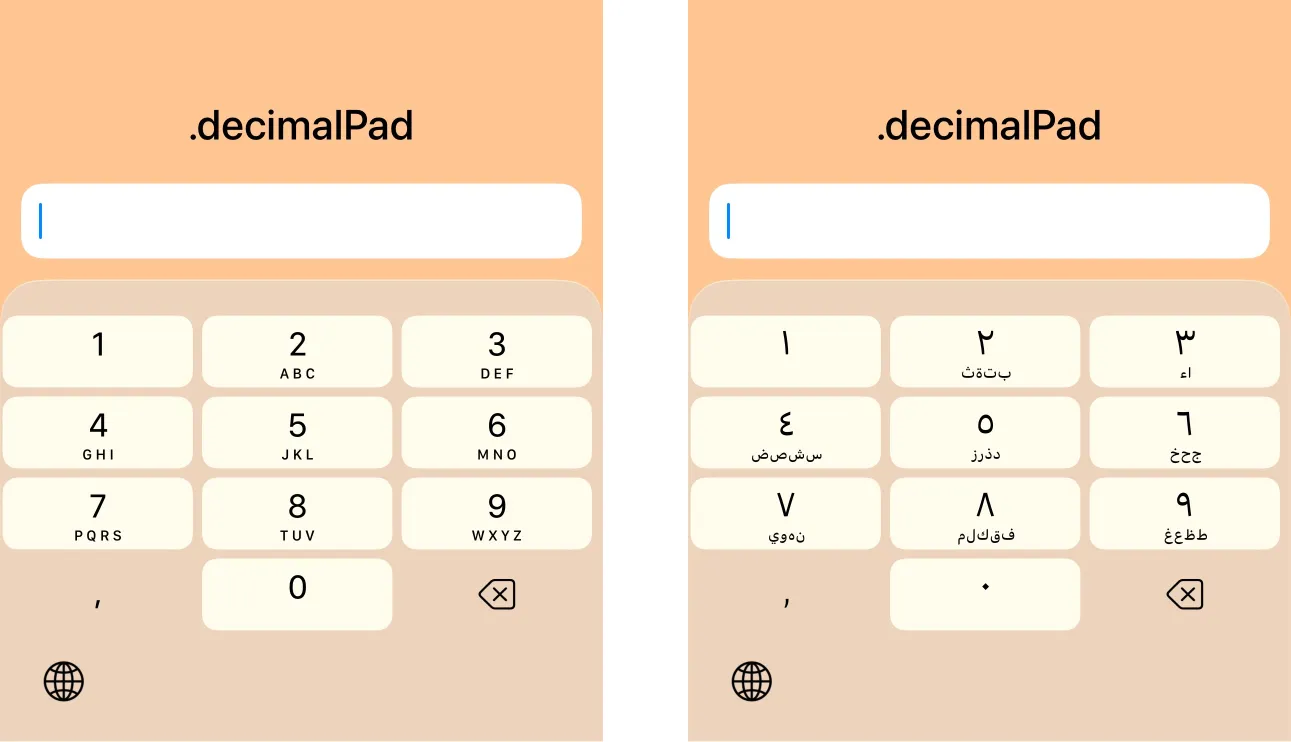
Use .decimalPad when the user may need decimal numbers.
TextField("Price", text: $price)
    .keyboardType(.decimalPad)
This works well for prices, measurements, or weight values. Use this instead of .numberPad whenever fractional values are valid.
URL keyboard
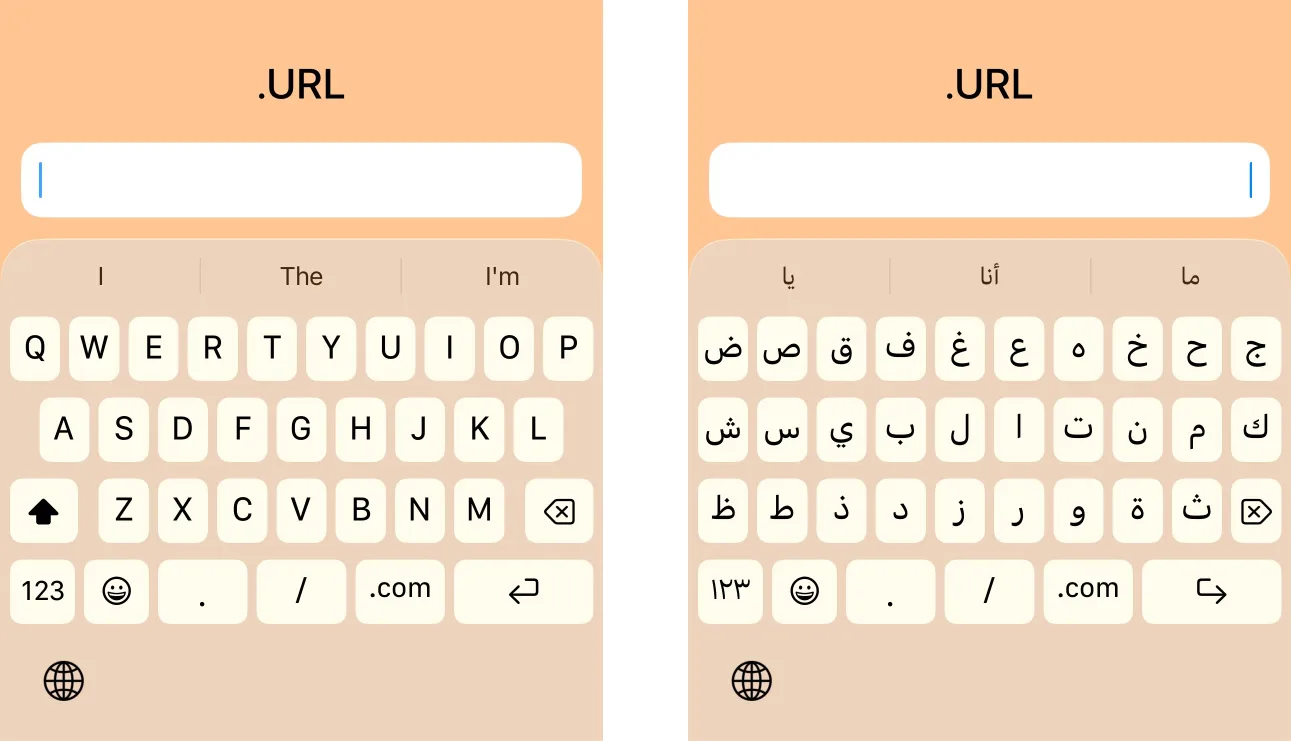
Use .URL when the user is entering a web address.
TextField("Website", text: $website)
    .keyboardType(.URL)
    .textInputAutocapitalization(.never)
    .autocorrectionDisabled()
This is a good fit for website fields, callback URLs, and profile links.
ASCII capable keyboard
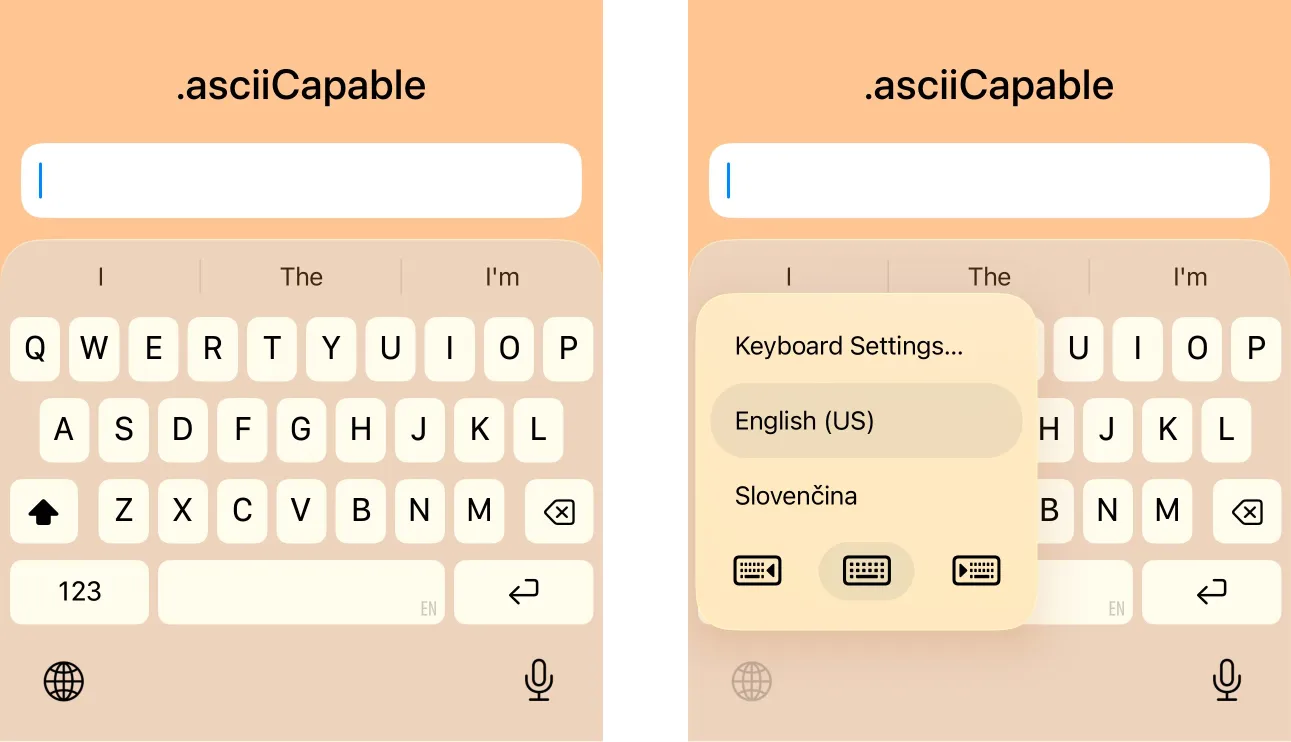
Use .asciiCapable when you want to encourage standard ASCII input. In the image above, notice that Arabic disappears from the keyboard picker when using this type of keyboard.
TextField("Username", text: $username)
    .keyboardType(.asciiCapable)
This can be handy for usernames, invite codes, or identifiers with stricter formatting requirements.
ASCII capable number pad keyboard
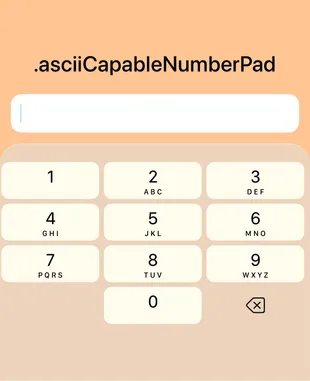
This keyboard provides a number pad that is intended to produce ASCII digits only.
TextField("One-time code", text: $otp)
    .keyboardType(.asciiCapableNumberPad)
Good for:
- one-time passwords
- verification codes
- machine-readable numeric input
This can be a nice choice when you want predictable numeric character output.
Other keyboard types in SwiftUI
Numbers and punctuation keyboard
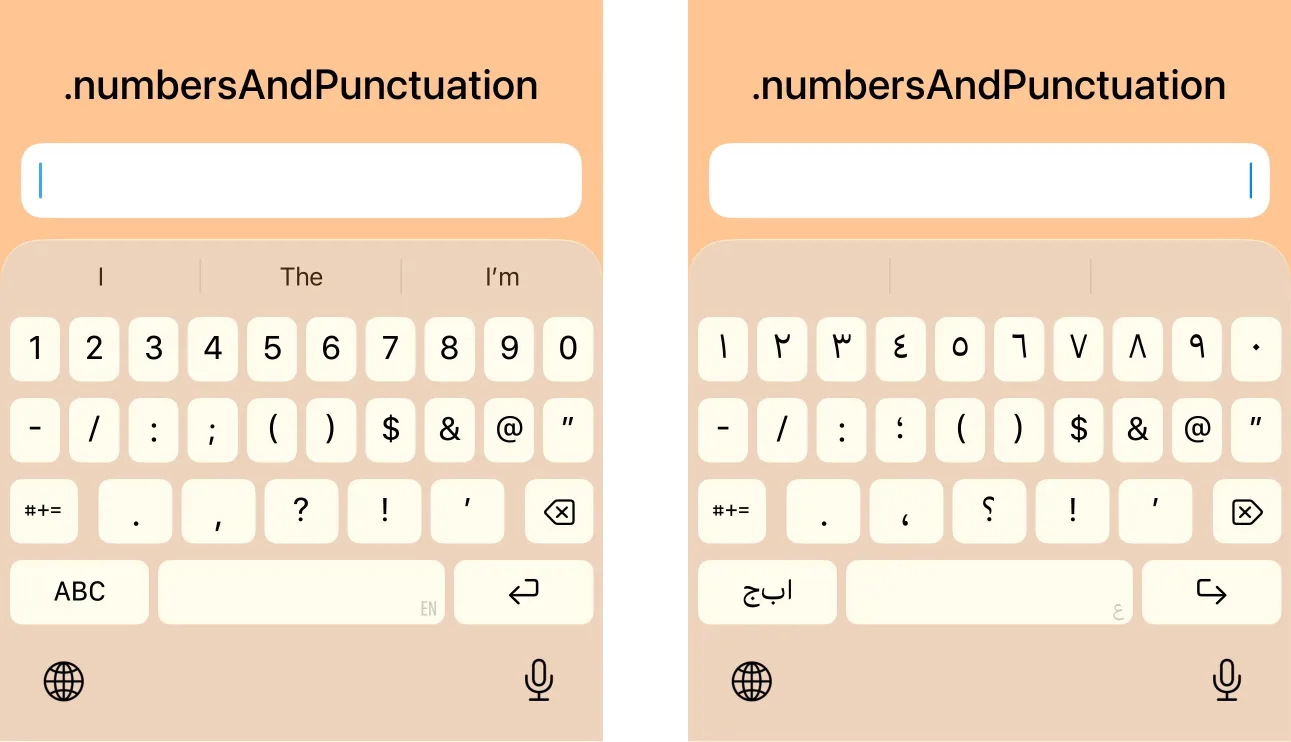
This keyboard emphasizes numbers and punctuation. It is similar to the default keyboard, but starts with numbers and punctuation instead of letters.
TextField("Reference", text: $reference)
    .keyboardType(.numbersAndPunctuation)
Good for:
- mixed numeric/symbol input
- codes with punctuation
- less common structured values
Name phone pad keyboard
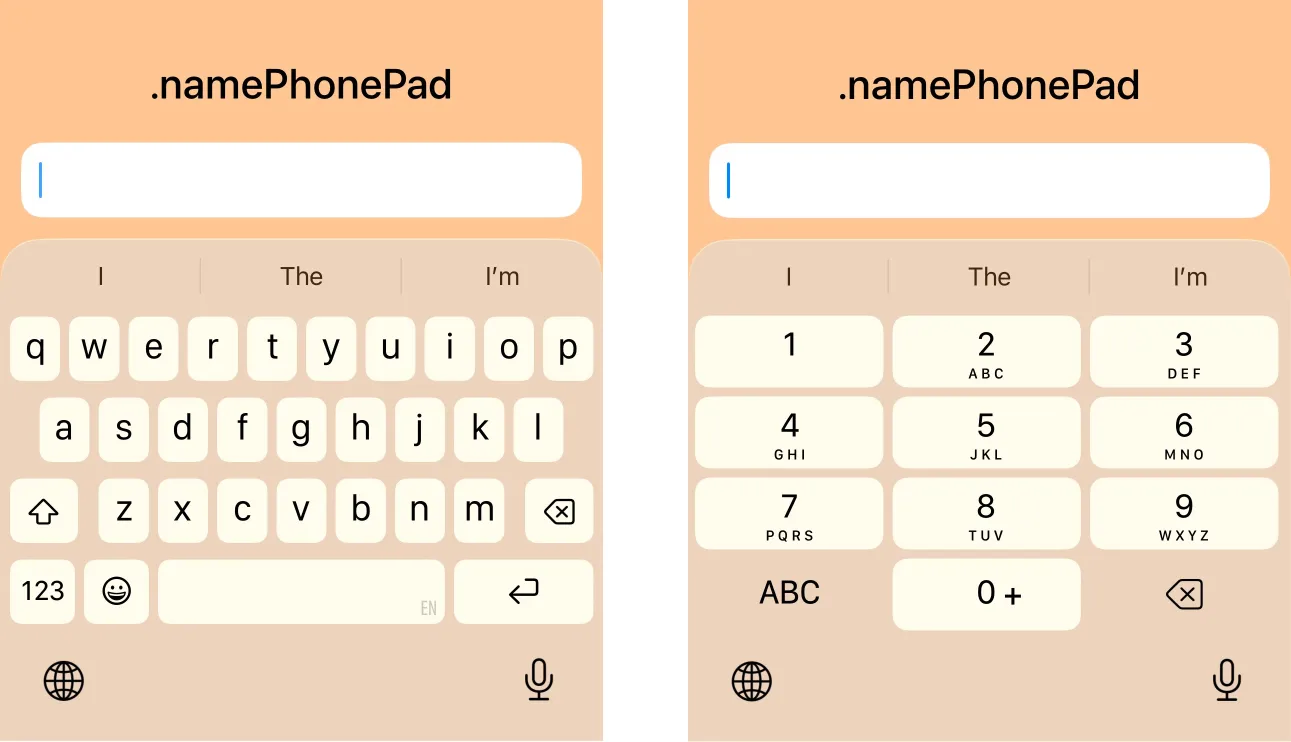
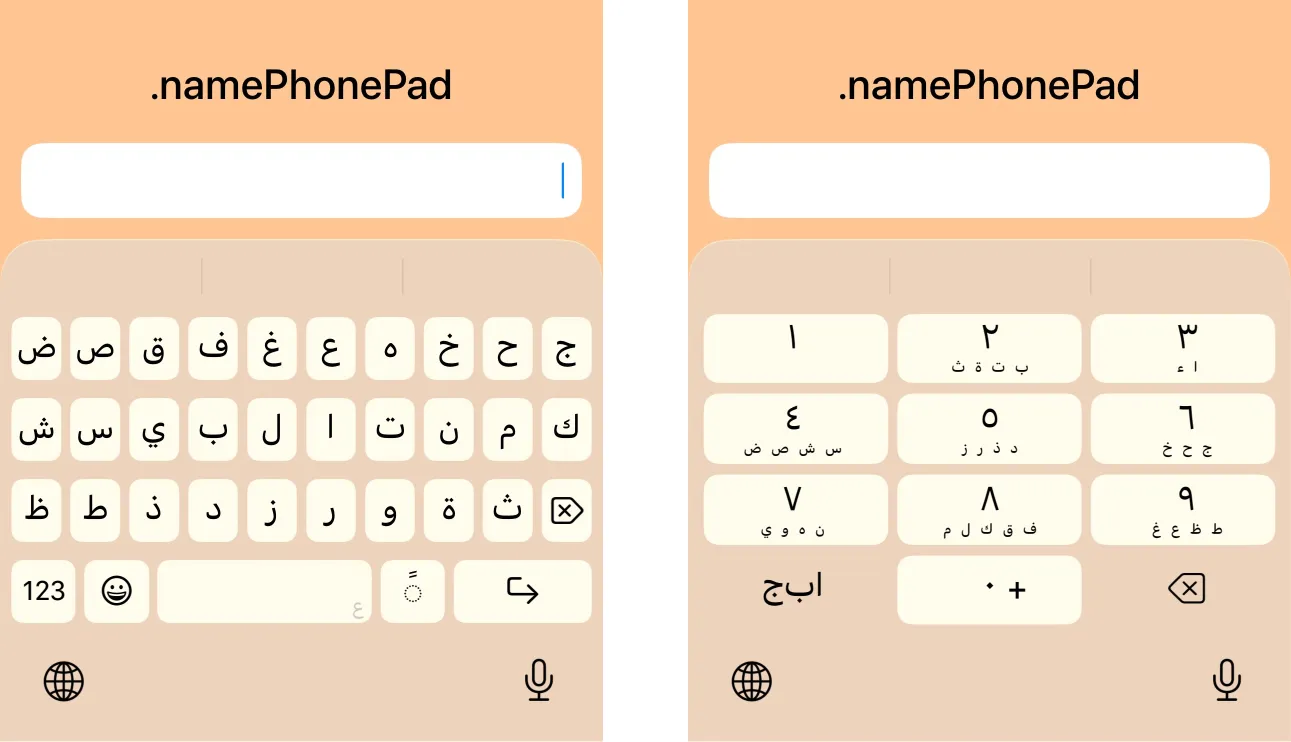
This keyboard is useful when the entered value might be a person’s name or a phone number. The keyboard is initially displayed the same way as the default keyboard in alphabet input mode. When switching to the alternate layout, it shows a phone-style keypad instead of the usual numbers-and-punctuation layout.
TextField("Contact", text: $contact)
    .keyboardType(.namePhonePad)
This is a good choice for contact forms and recipient fields.
Web search keyboard
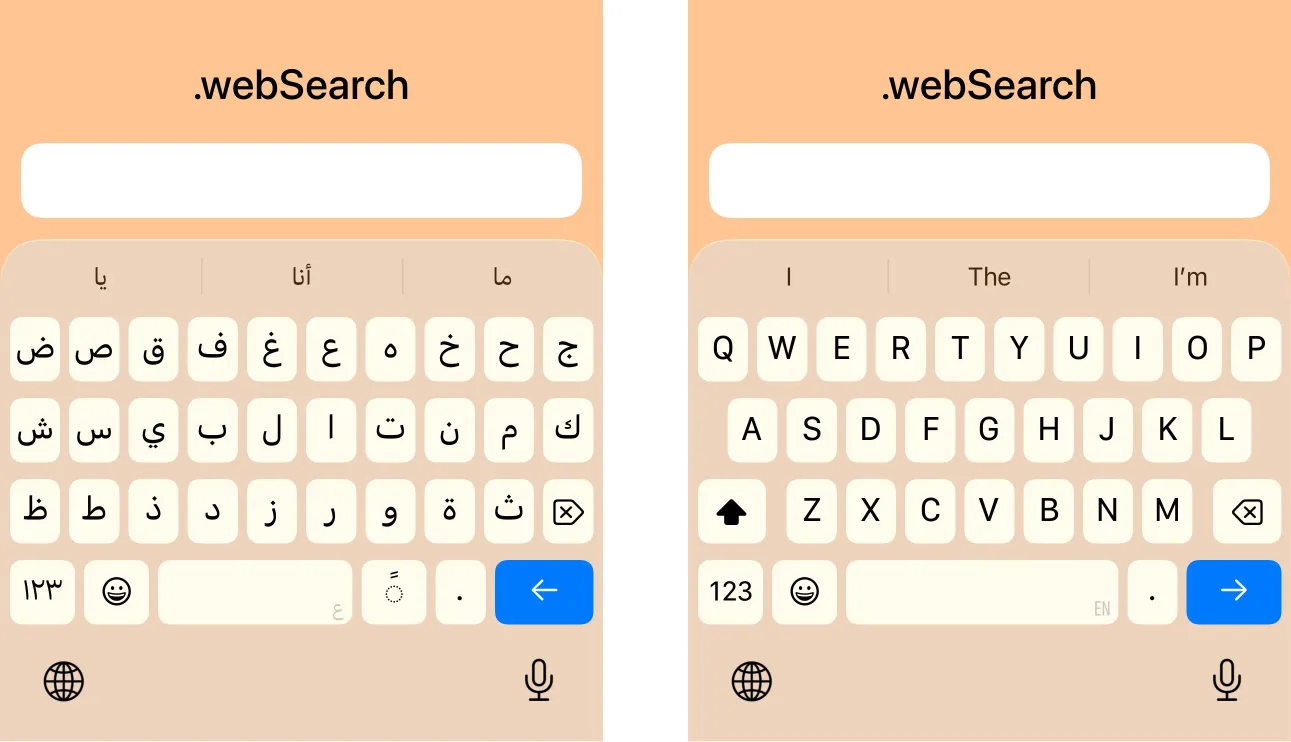
This keyboard is intended for search terms and web-style queries.
TextField("Search", text: $query)
    .keyboardType(.webSearch)
Good for in-app browser search, search bars, web lookup flows.
Twitter keyboard
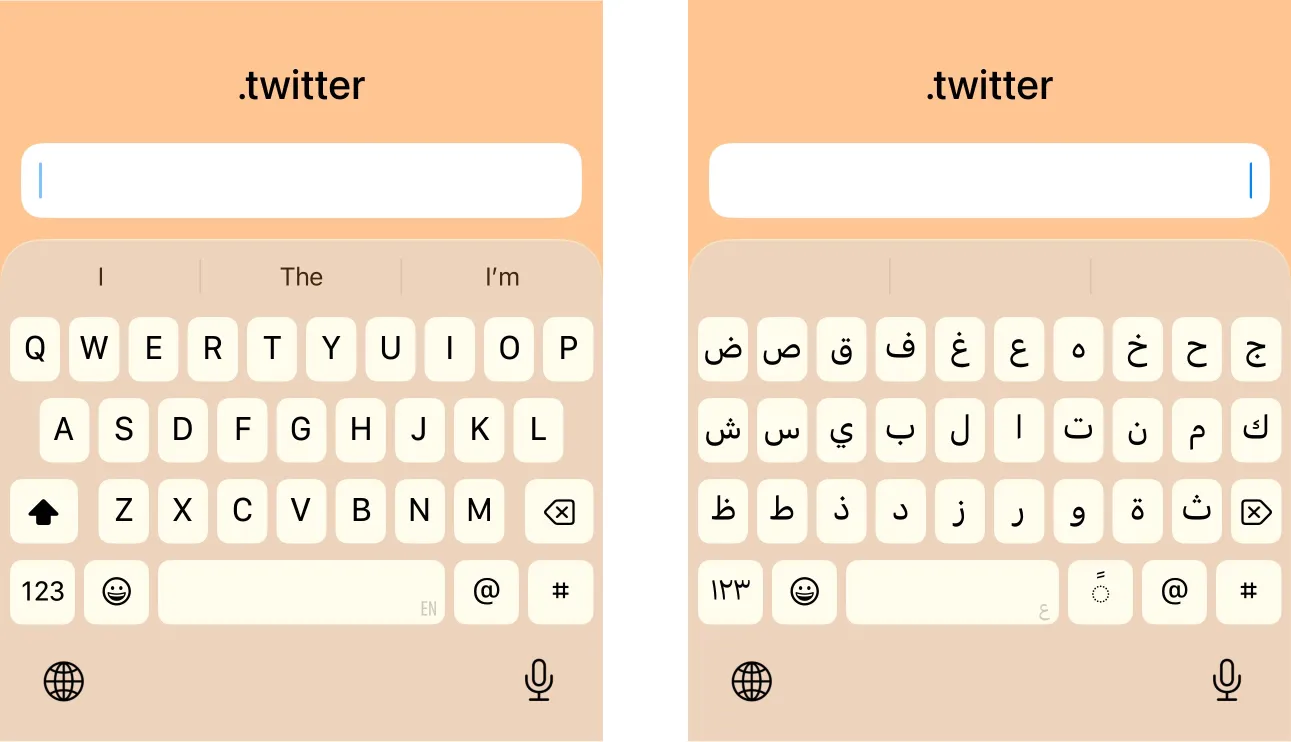
This keyboard is optimized for input that may frequently use @ and #.
TextField("Tweet text", text: $tweetText)
    .keyboardType(.twitter)
Good for handles, hashtags, social content creation.
Difference between numberPad vs asciiCapableNumberPad
At first glance, these two keyboard types look almost identical. Both show a numeric keypad, so it is easy to assume they behave the same. However, there is one important difference.
Why does this matter?
Not all numeric-looking characters are ASCII digits.
ASCII digits are only:
0123456789However, Unicode also contains many other digit sets that look numeric to humans but are technically different characters.
Examples of non-ASCII digits:
١٢٣٤٥٦— Arabic-Indic digits۱۲۳۴۵۶— Persian digits१२३४५६— Devanagari digits123456— Fullwidth digits
They may all visually represent “123456”, but they are not the same string as ASCII 123456.
For example:
let ascii = "123456"
let fullwidth = "123456"
let arabicIndic = "١٢٣٤٥٦"

print(ascii == fullwidth)    // false
print(ascii == arabicIndic)  // false
Real-world example
Imagine you are building a 6-digit OTP field.
TextField("Enter code", text: $code)
    .keyboardType(.asciiCapableNumberPad)
If your backend expects the value to match a strict format such as exactly 6 ASCII digits, using .asciiCapableNumberPad is the safer option.
A validation like this:
let isValid = code.range(of: #"^[0-9]{6}$"#, options: .regularExpression) != nilmay reject visually numeric characters which are not ASCII digits.
Rule of thumb
Use:
.numberPadfor general numeric input.asciiCapableNumberPadfor machine-validated numeric input
If the value is just a number shown to the user, .numberPad is usually enough. If the value must match a strict format for APIs, validation, or backend processing, prefer .asciiCapableNumberPad.
Which keyboard type should you use?
Here’s a practical cheat sheet:
- Name → .namePhonePad or .default
- Email → .emailAddress
- Phone → .phonePad
- Website → .URL
- Integer number → .numberPad
- Decimal number → .decimalPad
- Search → .webSearch
- OTP / verification code → .asciiCapableNumberPad
- Generic code / ASCII input → .asciiCapable
When in doubt, choose the keyboard that reduces the number of taps for the user.
Full example with multiple fields
Here’s a practical example showing several keyboard types in one form:
import SwiftUI

struct KeyboardTypesFormView: View {
    @State private var email = ""
    @State private var phoneNumber = ""
    @State private var age = ""
    @State private var price = ""
    @State private var website = ""

    var body: some View {
        Form {
            Section("Contact") {
                TextField("Email", text: $email)
                    .keyboardType(.emailAddress)
                    .textInputAutocapitalization(.never)
                    .autocorrectionDisabled()

                TextField("Phone number", text: $phoneNumber)
                    .keyboardType(.phonePad)
            }

            Section("Numbers") {
                TextField("Age", text: $age)
                    .keyboardType(.numberPad)

                TextField("Price", text: $price)
                    .keyboardType(.decimalPad)
            }

            Section("Online") {
                TextField("Website", text: $website)
                    .keyboardType(.URL)
                    .textInputAutocapitalization(.never)
                    .autocorrectionDisabled()
            }
        }
    }
}

#Preview {
    KeyboardTypesFormView()
}
This example also includes a few important additions:
.textInputAutocapitalization(.never).autocorrectionDisabled()
These are especially useful for email addresses, URLs, and usernames, where autocorrect or capitalization would be annoying.
Keyboard type does not validate input
This is important: setting the keyboard type does not validate the value.
For example, using .numberPad does not guarantee that your string contains only digits. It only suggests which keyboard should be shown.
You should still validate the input in your business logic.
Here’s a very simple example:
let isValidAge = Int(age) != nilOr for email:
let isValidEmail = email.contains("@") && email.contains(".")In production code, you’ll likely want more robust validation than this.
Best practices
1. Match the keyboard to the input
This sounds obvious, but it’s easy to overlook.
Don’t show the default keyboard for everything. Pick the keyboard that matches the expected content.
2. Disable autocorrection where appropriate
Autocorrection is useful for normal text. It is usually not useful for:
- email addresses
- URLs
- usernames
- codes
Example:
TextField("Username", text: $username)
    .keyboardType(.asciiCapable)
    .textInputAutocapitalization(.never)
    .autocorrectionDisabled()
3. Remember that some keyboards have no Return key
This catches many people off guard.
For example, .numberPad and .phonePad may not provide a Return button. If your flow depends on submission from the keyboard, you may need to add your own toolbar button.
4. Validate and format input separately
Keyboard type improves input ergonomics. It is not a validation, nor input formatting system.
Always validate and format the final value before saving, displaying, or sending it.
Adding a Done button for numeric keyboards
Since numeric keyboards often don’t include a Return key, adding a toolbar button can improve usability.
import SwiftUI

struct PriceInputView: View {
    @State private var price = ""
    @FocusState private var isPriceFocused: Bool

    var body: some View {
        TextField("Price", text: $price)
            .keyboardType(.decimalPad)
            .textFieldStyle(.roundedBorder)
            .focused($isPriceFocused)
            .toolbar {
                ToolbarItemGroup(placement: .keyboard) {
                    Spacer()

                    Button("Done") {
                        isPriceFocused = false
                    }
                }
            }
            .padding()
    }
}

#Preview {
    PriceInputView()
}
This is a nice quality-of-life improvement for forms with numeric input.
Conclusion
Setting keyboard types in SwiftUI is simple, but choosing the right one still matters because it has a real impact on usability.
A small modifier like .keyboardType(.emailAddress) can make your forms feel much more natural and polished. Combined with proper autocorrection settings and validation, it’s an easy win for better UX.
Happy and efficient coding!